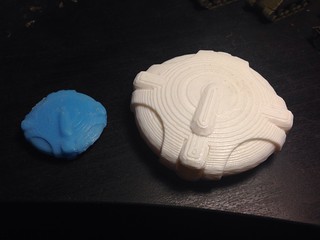
Small Scout UFO model printed in two sizes.
XCOM: Great video game or greatest video game? That is the question. And I’ve spent countless* hours playing it. I usually play games – often XCOM – when running my 3D printer, because it’s typically considered unsafe to leave one unattended; hobbyist 3D printers don’t have a lot of the failsafes that most consumer electronics have, so a bit of caution is warranted.
Anyways. XCOM. I’m a big fan. I squeed my socks off when I got some XCOM shot glasses at Firaxicon. Apparently you can put the XCOM logo on anything and I’ll go nuts. So that’s why I got stupidly excited when my husband designed a small scout UFO model for me.
Printed in white PLA, colorized with sharpies. I am currently using it as a drink coaster.
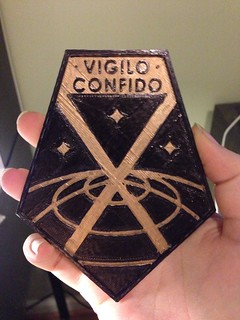
Then I found that someone had made a 3D model of the XCOM Logo, and I squeed even more. And then printed one immediately. I actually didn’t even stop to change filaments, and printed in the white filament that was already in the printer. It was pretty hard to see the logo itself printed all in white, so I got out my sharpies and went all Vi Hart on it.
I had already ordered a roll of olive green filament for another project, so I’ll likely print another one in green and do a filament switch to black to get the two color effect without getting sharpie all over my fingers.
Of course, the expansion to XCOM adds three other logos, one for the Gene Mod Troopers and one for the MEC Troopers, and yet one more logo for the new enemy faction Exalt. I wanted 3D models of all of them. And, because the XCOM:EW logos are orange, I now obviously need a spool of orange filament. I have a problem.
Recreating models from scratch is a daunting task. I do not have actual 3D modeling talent, skill, or software. Even so, I was able to find out how to create these models using the flat 2D images that are all over the internet and a few freeware tools. There are probably better ways to do this, but this is what I figured out. Suggestions for process improvement are welcome.
Making 3D (technically 2.5D) Models From 2D Image Files
Step 1: Find flat grayscale image files. I used Google Image Search, because Google knows all things. Acceptable formats are GIF, JPG, PNG, BMP. If your picture has colors, you’ll need to convert it to grayscale. Higher res is better; my Exalt logo is made off a relatively low-resolution image, and it shows. If you’ve got vector art files, you’re basically cheating. Load that directly into a 3D modeling program like Blender and extrude it yourself. But for us plebes with bitmap files, we’ve got our work cut out for us.
Step 2: Use Shapeways 2D to 3D webapp to create 3D model. Just tell it how large you want it and if you want it to treat grayscale as topographic data or not, then download. The downloaded model is an .x3db file type, which I had never seen before.
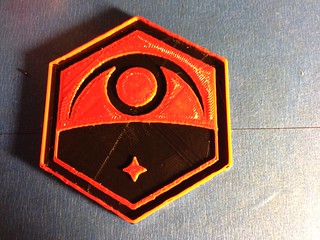
Exalt Logo. My red filament is a little translucent, so the red on top of the black is much more muted than I had hoped. Combine that with the terrible lighting and my potatocam, and you have an orange picture that didn’t use any orange filament.
Step 3: Translate the file to STL. I used Netfabb Basic to do this. Open the part, Export to STL. There’s a lot that program can used for, but I just wanted it to save the model in a format that I know how to deal with.
At this point, you might be done and ready to send the model to your printer. However, if you want to make some edits to the model – I needed to add bases and raised rims to use these as coasters – there are a few more steps.
Step 4: Decimate the model. This may not be necessary depending on the size of your part, and whether or not you want to tweak it, but the files that Shapeways spat out had upwards of 50,000 faces and the program I was using to make my minor edits was choking under the strain. Those faces were largely extraneous, so I needed to simplify them. I ended up using MeshLab and this tutorial to reduce my models to a much more manageable 5000 faces. That’s still probably more than these models need, but it was enough that the 3D modeling program in Step 5 would play nice.
Step 5: Make edits. I used 123D Design to draw a polygon that matched the shape of the perimeter and extrude it up into a solid to form the backing of the logo, and then I subtracted another polygon from the top to make the edges slightly raised above the features in the center.
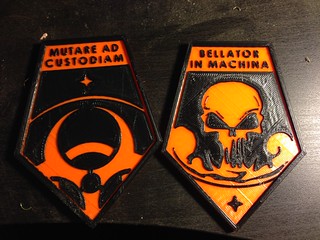
Genemod and MEC logos
The complete set of XCOM:EW logos is now available for your printing pleasure. I got the two-tone effect by switching out the filaments in the middle of the print. It works pretty well as long as both filaments are a) the same plastic and b) kind of close in diameter.
Now, if you’ll excuse me, I have an alien base in China to go clear out. Again. I’m not too eager to find out what monstrosities await me – last time there was a cyberdisc named Dreadnought, and it was a problem – but I desperately need that sweet, sweet Asia continent bonus.
*Not actually countless. Steam has conveniently counted them for me. It is very many hours. Long War is long.

I don’t know if you check this, but my brother-in-law recently got a 3-D Printer. Would you be willing to share the design files you used for the Faction Symbols and the base Vigilo Confido? (Even the small alien ship is amazing)
If you aren’t I’d totally understand as it probably took you a long time and effort.
You can reach me at block07024@yahoo.com
Thanks for taking the time to read this!
-Alex
Hi! There are links in the post to thingiverse, where you can download the STL files for printing. Is that what you are looking for?