Current Projects

I thought it would be helpful (mostly just for me) to list out the status of my current projects. So, here’s where I am:

Traveling 3D Printer Show

My printer has been to Maker Faires, Science Days, and even a Science Fair at a local elementary school. I won’t be able to make it to NoVa Mini Maker Faire (but you should go if you can!), but I will be at Rockville Science Day.

My exhibit has seen many, many small hands, and suffered much attrition. Pikachu finally walked (I’m shocked it took this long), the T-Rex skull’s lower jaw broke, and Bulbasaur has some, ahem, structural issues. I am hoping to re-print some of these really popular models before my next event.

Maker’s Notebook

This one is a project for school, but I’m hoping that my group will continue development on it after we finish in the spring; it has the potential to be a really useful product. The Maker’s Notebook is a webapp that elicits project planning and multimedia documentation. It’s sort of like a science notebook, but for engineers or makers. We’re designing it for use in classrooms/afterschool maker clubs, but it really could be used by anyone (when it works, that is).
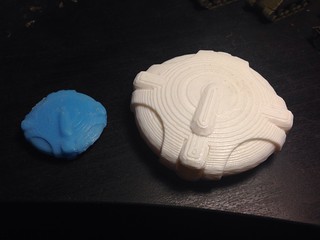
Pip-boy

A friend is putting together a Vault Boy costume and asked for a Pip-Boy for it. I missed the dates of the con he wanted it for due to a bad belt on the printer, but I’m still working on it for future cosplay fun. I’m using these models to create a Pip-Boy that can be used with a mobile phone for the screen. It’s a complex project with many pieces to print, but overall really well designed. My current holdup is that one of the files causes Slic3r to crash. Next steps: Check for Slic3r updates; use alternative slicing engine like Cura.

SLA Printer

This is a really exciting project that I got very close to the printing stage. The software, firmware, and electronics are all in place, and the remaining issue is the design and construction of the vat. Once I have that settled, it’s just fine tuning and tweaking. However, epoxies and resins are generally nasty substances, and they get nastier when they are curing (although they’re generally inert afterwards). Exposure at hobbyist-levels is a risk I’m willing to take under typical circumstances, but I’m not going to be playing with any resins or epoxies while I’m pregnant, so this one is going on the shelf for a while.

Finishing 3D printed parts

16460724364_ef4540c03b_n

Very visible layer lines on these UFO models

3D printing leaves a clear layering pattern on finished parts due to how the models are constructed. This layering is sometimes not acceptable aesthetically for finished parts, so what can you do?

Printing at 0.1mm leaves much smaller layers than printing at 0.3mm. These smaller layers have smaller ridges, and will make all of the following steps go so much faster. if a nice smooth finish is your goal, take the extra time and print at as low a layer height as you can.

Next, you need to actually get rid of the ridges. You can either sand the ridges down or build up some other material over them. I’ve had much better luck with the latter approach. I’ve used XTC-3D with some success, although it takes hours to days to cure fully and it’s easy to overdo it. Use several light coats instead of one large one, and set the part aside for several days before use or painting.

24316494025_78307dc108_n

Bottom of Cobra

I’ve also had some pretty good results just using regular primer and sandpaper. The Elite: Dangerous Cobra model here was printed at 0.1mm and:

  • Primed with regular black spray primer (lightly)
  • Sanded with 150 grit sandpaper
  • Another layer of primer
  • Sanded with 150 and 400 grit
  • Another layer of primer
  • Sanded with 400 and 800 grit sandpaper

As you can see, the layer lines are all but gone, although the surface is still somewhat textured. I could have gone up to 1500 grit sandpaper for an incredibly smooth finish but that would have been overkill for this project.

24316494045_48356eb16f_n

Finished “onionhead” paint job – top of Cobra

I then finished up the model with some miniatures paints, which I am admittedly not very skilled at.

Modifiying a DLP projector for use in an SLA printer

So you want to build an SLA printer? You’ve got two choices for UV light sources; a UV laser, often salvaged from a DVD player, that has to move on two axis to draw the layer patterns, or a projector that projects the whole layer at once.

A projector is faster (one layer at a time) and has fewer moving parts (no X or Y axis). However, projectors are expensive, and only DLP type projectors work without extensive modification. If you decide to use a projector for your printer design, make sure you’re getting a DLP. The other common types of projectors are LED and LCD, and while those might be modifiable to work, it won’t be as easy. Also, higher resolution printers mean higher resolution prints, so there is a real benefit to going the HD route.

Continue reading

My newest project: An SLA Printer (WIP)

I’ve been building a stereolithography (SLA) printer recently. This is a different 3D printing technology that is capable of much finer details than typical FDM printers, but is a lot more finickey and not as commercialized. All of the commercially available SLA printers are in the $3k-ish price range. There aren’t any existing RepRap-type models that you can download the parts and print yourself, nor are there any Printrbot-type sub-$1k entry level models but apparently SeemeCNC has a BYOProjector kit for $400. There are a couple on the horizon (such as Peachy Printer) that are promising but as of this writing still vaporware. So… if I want one, I have to build it myself, with parts I found in my basement.

I have no idea what I'm doing

Continue reading

Looking forward to the National Maker Faire; or, Have 3D Printer, Will Travel

The National Maker Faire is coming up and I am super excited to be involved. This will be the first Maker Faire that I have been to that isn’t qualified with a “Mini.”

I’ve made some special preparations for this event, knowing as I do that I won’t have access to a car, nor would there be any parking on site anyhow. So, both myself and my printer need to make it to UDC by Metro.

At previous faires, I’ve always needed a monitor to plug into my Octopi to actually run the printer. Previously, I’ve lugged around a spare 17″ monitor that we had at home, but that’s heavy and large. I would also grab the wireless keyboard and mouse we use for our gaming rig, leaving that device without input methods for the duration, plus for the few days after each faire before I actually unpack things. The printer itself has been lovingly hand-carried to events, getting a whole seat in the car to itself, while all its accessories traveled in an undignified heap in canvas grocery bags.

Continue reading

My Tank is Fight

The complete set. We don’t actually own a chess board so they’re on a checkers board.

Tanks are awesome. I like tanks.

So Dustin designed chess set of WWII tanks. Axis vs. Allies tank chess set! Awesome! In the words of the three-year-old boy who saw these at Rockville Science Day, “FIGHT TRUCKS!”

There are six unique models for each side of the war: Pawn, Rook, Knight, Bishop, Queen, King. Each one took about 3 hours to design in TinkerCAD and and about an hour to print at 0.1mm layer height; 10% infill and 10 top layers are recommended to handle the shallow slopes without gaps. In general, no supports are needed. A chess symbol is embossed into the bottom of each piece to identify it; this bridges without supports.

Continue reading

Proto Hot Sauce

It’s spring again, and that means it’s time for a new set of plants in the garden. I actually planted two weeks ago and never documented it.

As always, my end objective is hot sauce, and to that end I have planted two tomato plants and six hot pepper plants. However, my earlier experiments with sweet bell peppers ended generally in failure so I needed to find something else to do with the second plot. I did consider MOAR PEPPARZ, but I ruled it out because I am still working my way through the sauces I made last summer, and that after giving away more than half of the bottles. Instead, I figured I’d try something completely different. Here’s what I ended up planting:

Continue reading

Tips for running a 3D Printer at a Maker Faire

I’ve now run my 3D printer at 4 different Maker Faires, and I have learned a lot about how to best engage and educate people about the hobby. If you’re interested in bringing your 3D printer to a Maker Faire or any other type of show and tell event, here are some tips on how to plan it.

Know your audience.

In my experience, there are three separate audiences you’ll be meeting, each with different questions and different methods of engagement.

Continue reading

3D Printed XCOM stuff; or, How to make 3D models from 2D images

Small Scout UFO model printed in two sizes.

XCOM: Great video game or greatest video game? That is the question. And I’ve spent countless* hours playing it. I usually play games – often XCOM – when running my 3D printer, because it’s typically considered unsafe to leave one unattended; hobbyist 3D printers don’t have a lot of the failsafes that most consumer electronics have, so a bit of caution is warranted.

Anyways. XCOM. I’m a big fan. I squeed my socks off when I got some XCOM shot glasses at Firaxicon. Apparently you can put the XCOM logo on anything and I’ll go nuts. So that’s why I got stupidly excited when my husband designed a small scout UFO model for me.

Continue reading